When it comes to enhancing the comfort and style of your home, choosing the right custom fireplace mantel can make all the difference. Not only does it serve as a focal point in your living space, but it also adds a touch of personality and warmth. Whether you’re in the process of remodeling or just looking to update your current fireplace, a custom mantel is a great way to infuse luxury and charm into your home’s ambiance. In this article, we’ll guide you through selecting the perfect mantel for your space, installing it correctly, and avoiding common pitfalls that could occur during the installation process.
1. Choosing the Right Custom Fireplace Mantel for Your Home
Deciding on a fireplace mantel involves more than just picking a style you like; it requires consideration of the space’s dimensions, your home’s overall decor, and the mantel’s material and functionality. Here’s how to ensure you select a mantel that not only looks great but also complements your home perfectly:
- Measure Your Space: Accurate measurements are crucial to ensure your mantel fits well and enhances your fireplace’s aesthetic.
- Consider the Style: Think about whether a traditional, contemporary, or rustic mantel would best match your home’s existing decor.
- Material Matters: Choose from wood, stone, metal, or other materials based on durability, maintenance, and visual appeal.
2. Step-by-Step Guide to Installing a Custom Fireplace Mantel
Installing a fireplace mantel can be a rewarding DIY project if done correctly. This section will walk you through the installation process, ensuring your new mantel is both secure and stunning:
- Preparation: Gather all necessary tools and materials before starting.
- Attachment: Follow specific guidelines for securing the mantel to your type of fireplace.
- Finishing Touches: Apply any final adjustments or decorations to complete the look.
3. Common Mistakes to Avoid When Installing a Fireplace Mantel
Avoid common errors that could compromise the beauty and functionality of your fireplace mantel:
- Ignoring the Manufacturer’s Instructions: Always adhere to the guidelines provided to avoid structural issues.
- Incorrect Measurements: Double-check all measurements to ensure a perfect fit.
- Poor Material Choice: Consider the heat tolerance and durability of materials to ensure longevity.
By taking the time to choose the right mantel for your home, carefully installing it, and steering clear of installation blunders, you can enhance your living space with a stunning and functional fireplace mantel that you’ll enjoy for years to come. Remember, whether you’re in New York, London, or Tokyo, local expertise is just a click away through BuildNet’s directory of seasoned professionals who can help bring your home improvement dreams to life.
If you’re ready to take your home improvement or construction project to the next level, we can help! Find trusted contractors on BuildNet, whether you’re looking for renovations, new builds, electrical work, plumbing, or anything in between. Our directory connects you with qualified professionals who can make your vision a reality.
Choosing the Right Custom Fireplace Mantel for Your Home
When it comes to enhancing the cozy atmosphere of your living space, few features make a statement like a custom fireplace mantel. Whether you’re nestled in a charming cottage in the outskirts of town or residing in a bustling city apartment, the right mantel can transform your fireplace into the heart of your home. In this guide, we’ll explore how to pick the perfect custom fireplace mantel that not only complements your home’s style but also turns your fireplace into a stunning focal point. So, let’s get started!
Understanding the Basics of Fireplace Mantels
Before diving into the myriad of styles and materials available, it’s essential to grasp what a fireplace mantel is. Traditionally, a fireplace mantel serves as a decorative frame for the opening of a fireplace, often extending to include an outer hearth and additional shelving. Beyond its functional role of protecting surrounding areas from heat and sparks, the mantel provides a prime display space for personal artifacts, artwork, and seasonal decorations.
Assessing Your Home’s Style and Décor
The first step in choosing a custom fireplace mantel is to consider the overall style and décor of your home. Here’s how you can align your mantel with your home’s character:
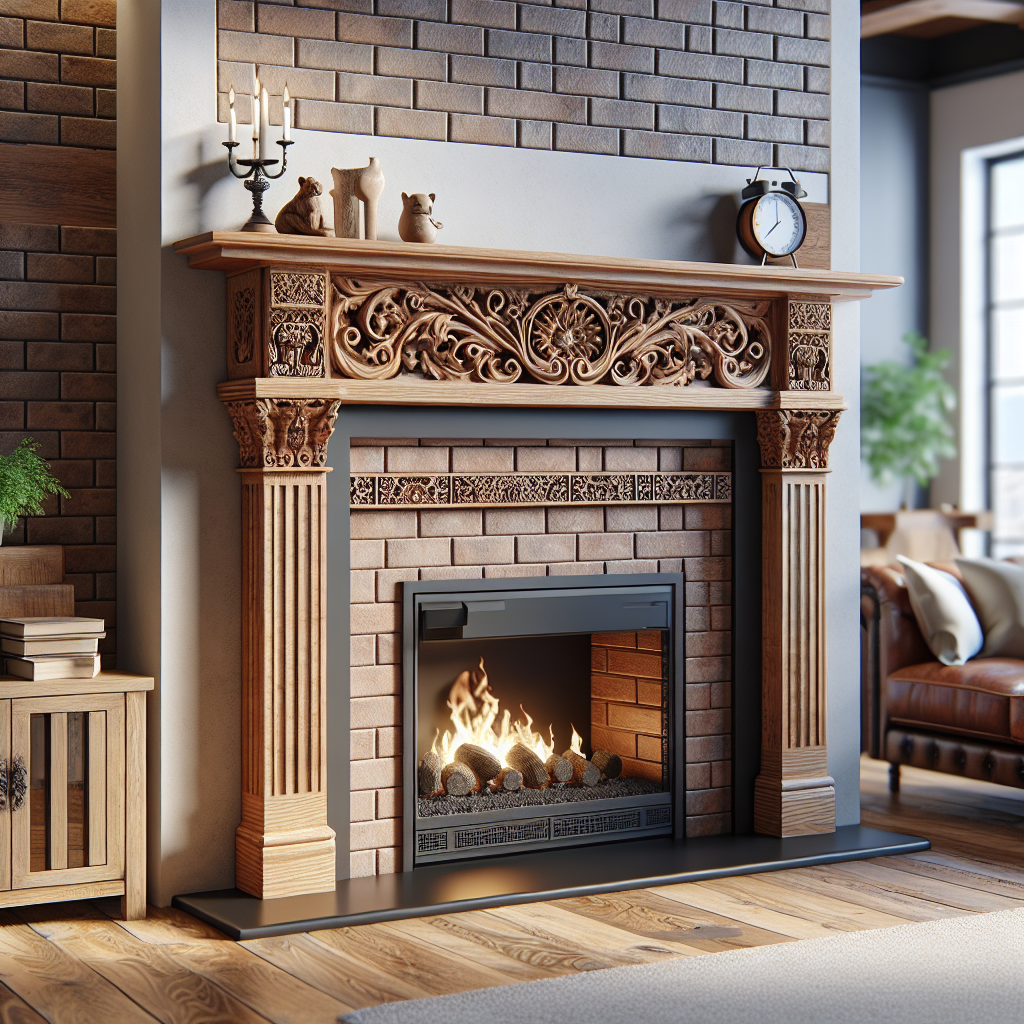
- Traditional Homes: Opt for mantels with classic lines and intricate detailing like crown molding if your home features a more traditional or antique style.
- Modern Homes: Look for sleek, minimalist mantels with clean lines that enhance the contemporary feel of your space.
- Rustic Homes: A mantel made from reclaimed wood or with a distressed finish can add to the authenticity and warmth of rustic décor.
Matching your mantel with your home’s architectural style creates a cohesive aesthetic and enhances your interior design.
Choosing the Right Material
The material of your fireplace mantel significantly affects both its appearance and functionality. Here are some popular materials and their best uses:
- Wood: Ideal for both traditional and rustic homes, wood mantels offer versatility in finishes and carvings.
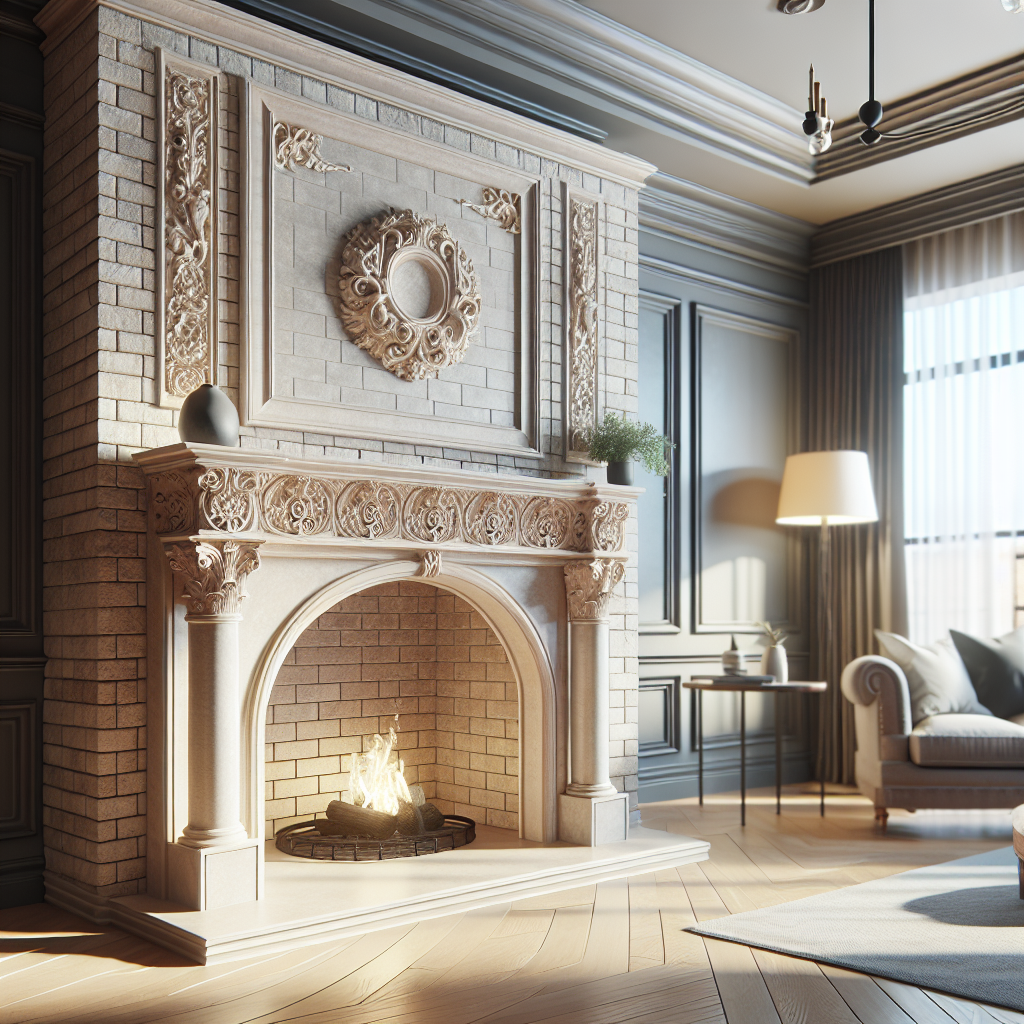
- Stone: Marble, granite, and limestone mantels suit luxurious and stately environments, offering high durability and a classic look.
- Metal: Perfect for industrial or modern interiors, metal mantels bring a sleek and bold edge to fireplaces.
- Concrete: For those who prefer an ultra-modern aesthetic, concrete mantels provide a unique, minimalist appeal that is also fire-resistant.
Consider the maintenance and durability of each material, especially if your fireplace is used frequently during colder months.
Measuring for the Perfect Fit
Accuracy in measuring your fireplace area is crucial for ensuring your custom mantel fits perfectly. Here’s a quick guide:
- Measure the width and height of the firebox opening.
- Determine the clearance required from the top of the firebox to the bottom of the mantel for safety purposes.
- Decide on the width of the mantel shelf; extending it beyond the firebox on either side creates a more balanced look.
- Consider the overall height of the mantel, which should align harmoniously with other architectural elements in the room.
These dimensions will help your mantel manufacturer or local contractor to create a mantel that fits your space perfectly.
Local Trends and Artisans
Exploring local trends and craftsmen can add a personalized touch to your mantel. Engaging with local artisans not only supports the community but also opens up opportunities for creating a truly unique piece. For example, a craftsman in your area might specialize in hand-carved wooden mantels that could provide a one-of-a-kind centerpiece for your living room.
Additionally, consider the prevalent architectural styles in your community. For instance, if you live in an area with a lot of Victorian homes, a mantel that reflects this style can not only enhance your home’s interior but also its curb appeal, should you decide to sell in the future.
Installation Considerations
While the installation details will be covered more comprehensively in another section, it’s important to remember a few key points when selecting your mantel:
- Ensure the mantel complies with local building codes and fireplace safety guidelines.
- Consider the weight of the mantel and the structural integrity of the wall it will be mounted on.
- Some materials, like stone or concrete, might require professional installation due to their weight and complexity.
By taking these factors into account, you can ensure that your beautiful new mantel is not only aesthetically pleasing but also safely and securely installed.
Final Thoughts
Choosing the right custom fireplace mantel involves a blend of aesthetic considerations and practicalities. By carefully assessing your home’s style, the material and design of the mantel, and local trends, you can select a mantel that enhances your living space and adds a warm, inviting ambiance. Remember, this mantel will be the centerpiece of many precious moments, so take your time to choose one that you’ll love for years to come.

Step-by-Step Guide to Installing a Custom Fireplace Mantel
Hey there! So, you’ve picked out the perfect custom fireplace mantel for your home—excellent choice! Now comes the fun part: installation. Whether you’re a DIY enthusiast or just trying to understand the process before hiring a professional, this guide is designed to walk you through each step of installing your custom fireplace mantel. Don’t worry; we’ll keep things light, straightforward, and engaging, so you feel ready to tackle this project with confidence!
Step 1: Gather Your Tools and Materials
First things first, let’s make sure you have all the tools and materials needed. Nothing is more frustrating than starting a project and realizing you’re missing something essential. Here’s a quick checklist:
- Measuring tape – Precision is key!
- Stud finder – Essential for secure mounting.
- Level – Keep everything straight.
- Drill with appropriate drill bits
- Screws and anchors – Check the type and size recommended by your mantel manufacturer.
- Mounting brackets or a mantel kit – Usually provided with your custom mantel.
- Safety goggles and gloves – Safety first!
- Pencil – For marking drill points.
Once you have your toolkit ready, you’re all set to move on to the next step!
Step 2: Prepare the Installation Area
Before you start drilling holes, it’s important to prepare the area. If you’re replacing an old mantel, make sure to carefully remove it and clean up any residual materials on the wall. Use your stud finder to locate the studs in the wall where the mantel will be mounted. This is crucial for a secure installation, especially for heavy mantels.
Mark the stud positions lightly with a pencil, and then hold up your mantel to approximate its position. Use your level to ensure it’s perfectly horizontal. Mark the wall through the mounting holes of the mantel to identify where you need to drill. This prep work will help ensure that the installation is both secure and level.
Step 3: Attach the Mounting Brackets
Most custom mantels come with their own mounting system. Attach the mounting brackets to the wall at the marked points, ensuring they align with the studs you located earlier. If the mantel is particularly heavy, you might need some extra hands to hold the brackets in place while you drill.
Use the drill to make pilot holes at the marked spots, and then secure the brackets with screws. If you’re drilling into drywall, make sure to use wall anchors to provide additional support. Double-check that each bracket is firm and level before moving on.
Step 4: Install the Mantel
Now, it’s time to mount the mantel onto the brackets. Depending on the design, it might simply sit on top of the brackets or attach with additional screws. Lift the mantel with care—again, this is easier with an extra pair of hands—and place it onto the brackets. Ensure it sits evenly and securely. If it wobbles or feels unstable, double-check that your brackets are properly attached to the studs.
Once in place, you may need to attach the mantel to the brackets using small screws or fasteners. Take your time to make sure everything is tight and secure. Stand back and use your level one more time to check that the mantel hasn’t shifted during the installation.
Step 5: Finishing Touches
With the mantel securely installed, step back and admire your handiwork. This is a good time to make any minor adjustments and tighten any fasteners. If you see any gaps between the wall and the back of the mantel, you can fill these in with caulk for a cleaner look.
If your mantel is made of wood or another paintable material, you might also consider giving it a fresh coat of paint or stain to really make it pop. Remember, this mantel is going to be a focal point in your room, so you want it to look its best.
Congratulations, you’ve just installed your custom fireplace mantel! Whether this is a DIY victory or you just wanted to be informed before hiring a pro, you now know exactly what goes into adding a stunning mantel to your home. Enjoy the warmth and beauty it brings to your space!
Common Mistakes to Avoid When Installing a Fireplace Mantel
Hey there! Ready to add that sleek, custom fireplace mantel to your living space? Whether it’s the classic wood look or something more modern, a fireplace mantel not only enhances your room’s aesthetics but also serves as a warm centerpiece. Yet, installing a mantel can be a tricky endeavor, and a few missteps could turn this exciting upgrade into a major headache. Let’s walk through some common pitfalls to avoid, ensuring your fireplace mantel installation is smooth and successful.
Not Measuring Accurately
It sounds like a no-brainer, but inaccurate measurements can lead to a world of frustration. Always measure twice before cutting once. Ensure your measurements include the width, height, and depth of the mantel. Also, consider any clearance requirements specified by building codes or the fireplace manufacturer, especially for combustible materials.
Ignoring the Weight of the Mantel
Mantels, particularly those made of heavy materials like stone or dense wood, can weigh more than you anticipate. This is not just a muscle issue—it’s a structural one. Ensure the wall structure can support the weight of the mantel. You might need to reinforce the wall or choose a lighter material if your current setup isn’t up to par.
Overlooking the Need for Proper Tools and Materials
While enthusiasm is crucial, it won’t replace the need for the right tools and materials. Depending on the type of mantel, you might need specific drills, levels, mounting brackets, and possibly a stud finder. Using inappropriate tools not only makes the job harder but can also damage your new mantel or your wall.
Choosing the Wrong Fixings
This one ties closely with the weight issue. Different wall materials require different types of fixings: drywall anchors, masonry anchors, or heavy-duty bolts. Using fixings that aren’t suitable for your wall material or the weight of the mantel can result in a weak installation that might cause damage over time.
Quick Fixation Tip:
Always opt for high-quality hardware that can handle more than the expected load. Remember, it’s not just about holding the mantel; it’s about ensuring it stays secure as you use the fireplace.
Skipping the Level
An uneven mantel is not just an eyesore; it can also impact the perception of your entire room’s decor. Using a level during installation isn’t optional—it’s essential. A slight error in alignment could be magnified over the length of the mantel, making everything placed on or above it look askew.
Not Testing the Fit Before Installation
If you’re DIYing this, a dry fit is your best friend. Before any permanent fixation, place the mantel to check for any adjustments in fit or placement issues. It’s easier to trim or reposition before the mantel is securely attached to the wall.
Neglecting Local Building Codes and Safety Regulations
Each area has its set of building codes and safety standards, especially concerning fireplaces. These might dictate how far the mantel needs to be from the fireplace opening or what materials are safe to use. Not adhering to these can not only result in fines but also pose serious safety risks.
Safety First:
Consult your local building authority or a professional if you’re unsure about the codes. It’s always better to double-check than to double back later!
Lacking a Clear Vision
Before you start, have a clear idea of how you want the final product to look. Consider the style of your room and the function of the mantel. Is it purely decorative, or will it need to support heavy objects? Rushing into the installation without a clear plan can lead to dissatisfaction with the final look, or worse, the need for costly adjustments after the fact.
Remember, installing a custom fireplace mantel can be a rewarding project that enhances your living space both aesthetically and functionally. Avoiding these common mistakes will help ensure that your installation process is as smooth as the finish on your beautiful new mantel. So gear up, measure twice, and install once!
FAQ: Choosing the Right Custom Fireplace Mantel for Your Home
How do I choose the right size for my fireplace mantel?
Begin by measuring the firebox width and add a minimum of six inches to both sides for an aesthetically pleasing overhang. Total mantel width should not overpower the room but should create a balanced look with the fireplace as the focal point.
What materials are available for custom fireplace mantels?
Popular materials include wood (oak, maple, cherry), stone (marble, granite, limestone), and metals (bronze, stainless steel). Each material has its unique aesthetic and maintenance requirements.
Can I customize the style of my fireplace mantel?
Absolutely! From traditional to contemporary, the style of your mantel can be tailored to match the decor of your home. Consider elements like carvings, moldings, or a simple, sleek finish depending on your personal taste.
What should I consider for the finish of my mantel?
The finish can significantly affect the look and feel of the mantel. Stains can enhance the natural beauty of wood, while paints can help blend or contrast with existing color schemes in your home.
Is it necessary to hire a professional for the installation of a custom mantel?
While it’s possible for a DIY-savvy homeowner to undertake this project, hiring a professional ensures that the mantel is securely and properly installed, especially when dealing with heavy materials like stone.
FAQ: Step-by-Step Guide to Installing a Custom Fireplace Mantel
What tools and materials do I need to install a fireplace mantel?
You will need measuring tape, a level, studs, a drill, screws, and possibly anchors depending on the wall type. Having some wood shims on hand can also be helpful for ensuring the mantel is level.
What are the first steps in installing a new fireplace mantel?
First, locate and mark the studs in your wall. This is crucial for securing the mantel safely. Measure and outline where the mantel will go to ensure it fits and is centered above your fireplace.
How do I ensure the mantel is secure once installed?
Use suitable fixings for your type of wall. If attaching to a brick wall, use heavy-duty anchors and screws. For drywall, ensure you are screwing into studs. Double-check that the mantel is level and make adjustments as necessary.
FAQ: Common Mistakes to Avoid When Installing a Fireplace Mantel
What is the most common mistake when installing a fireplace mantel?
One of the most common mistakes is not ensuring the mantel is level before securing it. An unlevel mantel is visually unappealing and can be unsafe.
How can I avoid damaging the mantel during installation?
Handle the mantel with care, especially if it’s made of softer materials like wood. Use soft cloths to protect the surface while you work, and ensure all tools are used appropriately.
Is it a mistake to overlook local building codes?
Yes, always check local building codes and regulations regarding fireplace installations. Ignoring these can lead to safety hazards and legal issues.
Conclusion
Choosing and installing the right custom fireplace mantel can transform the look and feel of your home. With the right preparation and knowledge, you can ensure a smooth process, whether you opt to do it yourself or hire a professional. Remember, the key to a successful installation lies in accurate measurements, correct materials, and a keen eye for detail.
If you’re considering adding a custom mantel to your home, why not get a free quote from a professional? Our experts at BuildNet are ready to help you every step of the way. From choosing the perfect design to ensuring a flawless installation, they’ve got you covered. Visit the BuildNet website today to connect with a local contractor and start bringing your dream fireplace to life!